
Brompton De-Fender
You would be forgiven for thinking that removing the mudguards (fenders) from a Brompton would be quite a simple, straight-forward affair. But alas, as with many Brompton related tasks and modifications, simple and straight-forward it is not. And why would anyone want to remove the mudguards anyway?

Well, I’m quite sure there are a number of good reasons, but mine was simply a question of weight reduction…and okay, I admit it; to achieve a more sporty look!
I mentioned in a previous post that I had recently bought an S2L as an addition to my M6L; a bike I could take out for a quick spin, and something nippy I could use as a ‘racer’ in the Brompton World Championships. I also mentioned that I would have preferred an S2L-X but couldn’t wait for one to be built and delivered to the dealer (they seldom have them in stock and no-one sells them second-hand, as far as I can tell).
So the whole point of this particular exercise was to remove any excess weight, however light each individual component might be, in order to reduce the overall weight of my S2L. And, of course, the most obvious place to start was with the mudguards.
Because the rear mudguard (on the L model) doubles as a third-wheel-support, for ease of dragging the Brompton along whilst it is parked or folded, as one might expect it is particularly well secured. There are in fact no less than three separate wire stays and a bracket, the former being attached to the rear A-frame, the latter to the brake spindle.

Removing them is quite fiddly as, firstly, you need to get your fingers between the wheel and rear frame to secure the locking nuts while you attempt to unscrew the screw, which holds the stays, in bunches of threes, onto the frame. Not an easy feat, especially if you have my kind of chubby sausages for fingers.
Anyway, once you have undone the nuts, you then find that the screw on the sprocket side is partially held in place by the chain and sprockets. This therefore requires the chain to be pulled to the side or slipped off the cog and the sprockets wiggled about a bit until the screw can be pulled clear of the frame with the tips of the fingers. Whilst rather inelegant, this is the slightly quicker way of doing it. A more ‘professional’ way might be to remove the rear wheel – but that would obviously take a bit more effort.
So now you’ve removed the two bolts and screws from the stays, the next step is to remove the bracket from the brake spindle. This is achieved by unscrewing the adjuster bolt on the rear side of the brake spindle and removing the whole adjuster, then the washer, the reflector, and finally, the brake spindle spacer. You then push the brake forward in an attempt to release it from the frame…but suddenly you realise that it is stuck against the wheel and won’t move far enough for the spindle to clear the hole. So you then have to loosen the brake cable so you can pull the brake away from the wheel and the frame without it snagging.
After a bit more jiggling, the mudguard comes free. The final step is to replace the brake, reflector, washers and nut, then tighten. However, you need to remember to centralise the brake and fit the cable so that the brakes are snug but not binding (ideally, you will have noted where the cable was secured previously).
I haven’t dealt with the rear rack model (the R version) here as mine is the L version, but I would expect this to be even more fiddly, given the number of additional attachments!
And so on to the front mudguard. This is a much simpler affair as far as removing it is concerned. It is relatively straight-forward in as much as there are only two stays to unscrew and the bracket that holds it onto the brake spindle requires the removal of just one nut and a washer.

One of the stays is fastened to right-hand side of the forks, the other to the front axle via the left wheel nut. There’s no need to loosen the brake cable, but you must remember to refit the brake nut and the washers, reposition (centralise) the brake, and tighten it all up again, once you’ve finished removing the mudguard. This includes the wheel nut and its respective washer, both of which have to be removed then replaced.
But that’s not the end of if. Because the mudguard has an integral nylon hook that is needed to keep the bike together whilst folded, it is necessary to buy a new one to replace the one that came off with the front mudguard. This is a specially designed hook (made for the E-model) and fits directly onto the wheel axle, behind the wheel nut.

The other thing that you ‘lose’ when you remove the front mudguard is inherent protection of the brake cable when turning right. Yes, it sounds a bit unlikely but so neatly put together is the Brompton that even a relatively minor thing such as turning the handle bars can have an unexpectedly adverse effect. If you remove the mudguard and don’t protect the cable, it rubs on the wheel when you turn right. Normally, the cable is protected by the mudguard, so once this has been removed, you need to find some other way of protecting the cable.

It would probably be quite easy to fabricate something, if you are that way inclined, but if you want something that’s specifically designed for the job, Brompton supply a small metal semi-circular plate that fits directly onto the forks (there’s a hole there specially for it). This just bolts on with the supplied screw, nut and washers: cable protected.
So there you have it. Who would have thought that simply removing the mudguards would take so much effort? You are probably now wondering why you should bother!
Next job: titanium forks…but only when I’ve saved up enough pocket money!
The Bicycle Botanist
On face value, to the initiated at least, surveying wildlife by bike might seem like the ideal occupation. And to some extent it is. For example, conducting a botanical survey by bicycle of a disused railway line that has been proposed for development to a cycleway, could not be more appropriate.

The Glasson to Lancaster Cycleway
Similarly, carrying out bat activity surveys of large sites such as hospitals or colleges, is very easily accomplished by bike, given the distances that have to be covered in a relatively short amount of time.
Both of these surveys I have done (for I am, as regular readers will know, a professional ecologist). But there are other situations where it just isn’t appropriate, or convenient, despite arguments to the contrary put forward by the always-carry-your-Brompton school. Yesterday was one such situation.
The situation in question was an ecological assessment of a relatively large piece of farmland in a rural part of lowland Lancashire (in northwest England).

The site was not too far from a railway station and I didn’t need to carry too much gear – just my iPad, binoculars, food, drink, waterproofs etc. – so I thought it would be an ideal candidate for a cycle-based site visit.
As expected, getting to the site was no problem. Quite a pleasant ride, in fact. Getting across the site itself however was a a totally different issue.

In fact, given the number of barbed-wire fences, extensive thickets of dense vegetation, marsh and swamp, it was barely accessible on foot, never mind bike! 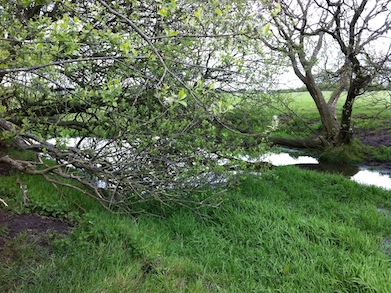
So the question was, what to do with the Brompton. There was no way I was going to carry it.
In the end, my only option was to carry it over a style and lock it to the nearest metal gate. How ‘safe’ that was going to be, I had no idea. It was a rural area, beside a public footpath, yes, but not an especially well-used one. So the most likely passing traffic would have been little more than the occasional rambler or inquisitive farm animal!

I could be wrong but I would kind of guess that these are not the type of people (or animals) that would normally nick a bike, not even a Brompton. I mean, how many ramblers do you know that carry heavy cutting equipment in their knapsacks?
No, the only risk I could think of was from the farmer, or one of his workers, perhaps. But, given that the farmer was my client, the chances of him or one of his employees cutting my bike from the gate seemed a little unlikely. So I took the risk.
Needless to say, the bike was still there when I got back a couple of hours later, totally undisturbed. And so was my helmet, which I had simply clipped onto the frame via the chin-strap.
Obviously, as I’ve discussed in an earlier post, the ‘whether to lock or carry’ debate is not a clear cut one, despite what some Brompton owners may think or say. It all really boils down to a question of circumstance, and at the risk of coming over all corporate and job’s-worthy, a case of making some form of appropriate risk assessment.
But then, isn’t that just a reflection of life in general?
In the City
This may seem terribly provincial, but, whilst I’ve been to London many times over the years, before yesterday I had never ridden my Brompton there. In fact, I had, until yesterday, only ever ridden one other bike in London – a Boris bike. Whilst there have been a number of recent initiatives to improve cycling in cities and increase the number of journeys, I have to say that riding a bike through central London during the main rush (which seems to last for several hours at either end of the day) is not for the faint-hearted.

Get Britain Cycling: a report has just been released by an all-party Parliamentary group in the UK which aims to increase cycling in proportion to the total journeys from 2% to 10% by 2025, with a further increase to 20% by 2050
It’s not of course the first time I’ve ridden in a big city – I ride in Manchester quite frequently, for example – but there’s something different about London. It’s like everyone is in a mad panic: like Armageddon is fast approaching (maybe it is); like they’ve all left the kettle on the stove and need to get back home before it boils dry and burns a hole in the bottom. Know what I mean?
But this doesn’t just apply to cycling. It’s the same when walking through London or taking the tube. However much you try and take a steady pace, you end up rushing along just like everyone else. And the longer you are there, the quicker your pace becomes until it’s impossible to distinguish your own behaviour from that of the natives. And the next thing you know, you’re tutting at people who get in your way, the ones who are trying to keep a steady pace, muttering “bloody tourists” under your breath.
Now I’ve never had the misfortune to live and work in London. But don’t get me wrong – I do like the place. In fact, it’s possibly my most favourite city in the world (closely followed by New York City, San Francisco and Barcelona). As well as having to regularly go to London on business, I often go there for the odd ‘city break’ with Mrs BigCam.

The London cityscape – an architectural meld of old an new
You see, London has such a lot going for it on many levels. It’s an exquisitely cosmopolitan city, there’s great food, great music, great history, great architecture, great art – there’s just so much to see and do. Yet despite all this, I can only bear to be there for three or four days in a row. After that, I feel shattered and need to go home for some respite.
I had always assumed that cycling across London would be an interesting, liberating and somewhat exhilarating experience, but that it was also likely to be hectic and at times, downright frightening. I was not wrong. It was all those things, and more. So having predicted this likely scenario, I had planned the routes to and from my various destinations in advance, with the intention of taking the backstreets and designated cycleways as much as possible. All well and good. Except that it’s impossible to keep away from busy roads. Just about every cycleway or backstreet cuts across or eventually joins a busy street or main thoroughfare.
My second strategy had been to take it easy, to just cycle at a steady pace, taking in the scenery, and to not be dragged along in the mad panic. But just as I had experienced with walking and the use of public transport, this was impossible. Within only a matter of minutes, I found myself hurtling round the city, dodging in and out of traffic, and racing buses and taxis out of the traffic lights so as not to get hemmed in. I also found myself overtaking moving vehicles, riding down the centre of the road, and contemplating entering into bouts of road rage with aggressive drivers like a seasoned cycle-courier – things I would never normally do. What had I become?
So now I’m back home. I thought that I’d feel less tired than when I normally go to London as I wouldn’t have spent so much time jostling around in the hustle and bustle, walking mile after mile of Underground subway, or running up and down escalators. But I feel just as shattered, in fact possibly more so…though in a curiously different way.
Will I do it again? Probably.
Little wheels go…absolutely nowhere
A couple of posts ago, I mentioned that I’d bought a turbo trainer so as not to lose my cycling-legs during the extended periods of poor weather we’d been having here in the UK. At the time, I hadn’t worked out a way to fit my Brompton (M6L) to it. As it happens, I still haven’t, but that’s not to say I haven’t made a breakthrough.

The Cycleops Fluid2 Trainer
Last month, due to a temporary lapse of sanity, I registered for the Brompton World Championships. Once I realised what I’d done and that the chances of my getting round the course within the hour were slim at best, given my current state of fitness, I decided to remedy it by firstly, getting into shape and secondly, buying a lighter bike.
With regard to the latter, my preference would have been a Brompton S2L-X, but, even had I ordered one straight away, the chances of it arriving in time for the race would have been pretty low. So I settled for an S2L purchased from those nice people at Cyclesurgery in Manchester who did me a very good deal, with a view to perhaps upgrading the forks and A-frame to titanium at a later date.

My shiny new S2L
Anyway, on to the ‘getting in shape’ part of the plan. Much as I’d like to be able to, I cannot control the weather. And at the risk of being labelled a fair-weather-biker, cycling in the wind and rain is no fun, and if anything, more of a disincentive than a useful means of getting race-fit. Which brings us back to the turbo trainer.
I said that I had not found a way of attaching an M6L. And I still haven’t. But what I have discovered, after a bit of trial and error, is a way to attached an S2L. Despite a trawl of the internet, there is surprisingly little information about this, and no solutions I could find. So here is my solution.
As you will have spotted from the picture above, my turbo trainer is the Cycleops Fluid2. This is designed to fit a regular bike, with the more usual 26” or 700C quick-release wheels. I think all Cycleops models are pretty much of the same design in that respect. Which is fair enough. But what do you do if (i) you have much smaller wheels (i.e. 16 inch wheels!) and (ii) the wheels don’t have a quick-release skewer?
Dealing with the simplest problem first, the Cycleops trainer is supplied with a special skewer that is meant to replace the existing one.

The axle skewer supplied by Cycleops
I’m not sure of the reason for this other than that it is constructed of metal (presumably chromium plated steel) and designed to fit the cups of the turbo trainer that hold the wheel in place. With an M6L or other Brompton variant that has a hub gear, you simply cannot fit the skewer. Nor can you fit the wheel nuts into the trainer because of the Sturmey-Archer gear selector chain. Therefore, you cannot fit the bike to the trainer.
However, if you have a single or two-gear model, you can, the reason being that the axle is hollow. Yes, it came as a surprise to me, too! All you need to do is thread the supplied axle-skewer through the existing axle then tighten and lock as you would do normally. You don’t even need to remove the wheel nuts. From what I can tell, it doesn’t interfere with the bike in any way, not even the fold. But even if that were not the case, it could be quickly removed after a static-cycling session.

The skewer fits straight through the existing axle. No need to remove the bolts
Once that’s fitted, it’s just a case of clamping the Brompton to the turbo trainer in exactly the same way you would a regular bike.

The rear wheel clamps into the turbo trainer in the normal way
So far, so good. Except that, if you fit a ‘skewered’ Brompton to an unmodified trainer, the roller will not meet the wheel as it is designed for a 26″ wheel or greater. But fortunately there’s a simple, though a little expensive, solution to this. Cycleops supply an adapter, which is essentially a bracket that raises the roller of the trainer closer to the wheel.
It is advertised as the ‘20/24″ Wheel Adapter‘, so you would be forgiven for thinking that it would be too short to enable the roller to meet a 16″ wheel. As it turns out, it works quite adequately on a 16″ wheel. So once this and the axle-skewer are fitted, the turbo trainer can be used in exactly the same way as with a regular bike.
Well, I say in exactly the same way but there is in fact quite a noticeable difference. Once fitted to the trainer, a Brompton ends up being a lot higher off the ground than a regular bike would be. Quite logical I suppose, if you think about it. In fact, it ends up being so high off the ground that you (or at least I) may need a step to get on and off the bike!

A Brompton S2L fitted to the Cycleops FLuid2 turbo trainer
The other thing is that the front wheel needs supporting at the right height too, or you will end up cycling in a nose-dive position. I use a Cycleops front wheel holder for this, except that I don’t place the wheel in the grooves but rather, I rest the wheel on the top. A little precarious I know, but it works. Anything of the right height would do and I’m sure a better solution will evolve, given time, but I don’t think it’s a major issue for now.
So there it is. You can fit a Brompton to a Cycleops turbo trainer after all, but only if you purchase the 20/24″ Wheel Adapter, and only if you have a single or two-speed model.
A New Way to Carry your Brompton?
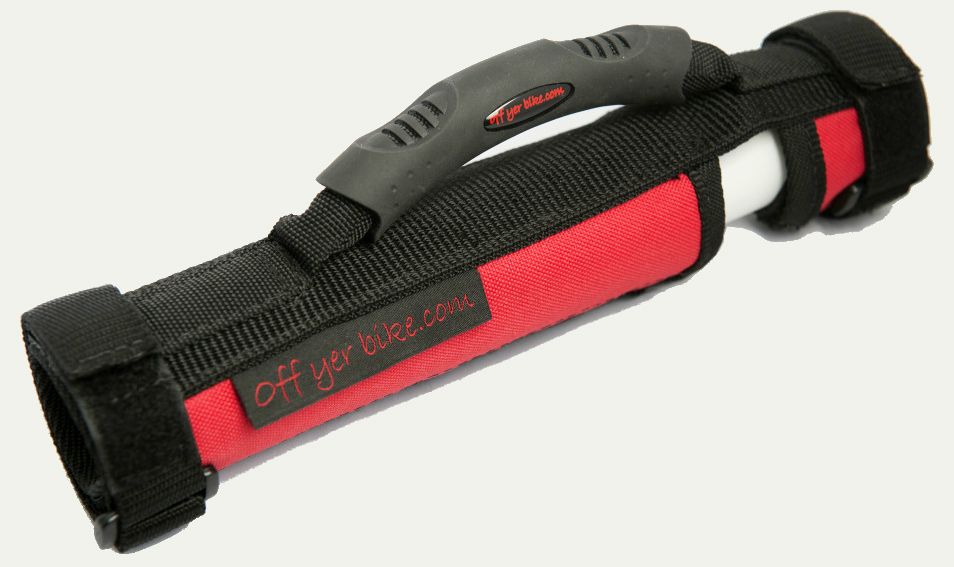
A Review of the Off Yer Bike Carry Handle
Since my last post, I have now had time to try out the Off yer bike Brompton Carry Handle. And I am pleased to report that it works! But I imagine you want to know a bit more than that before you go and fork out the £39.95 (with free worldwide shipping). Right? Right.
Well basically, this is a tough fabric handle that has been specifically designed to fit to the frame  of your Brompton. It comprises two main sections or pads; a smaller one which wraps around the part of the main frame tube near to the seat post, and a larger one that wraps around the larger part of the frame tube.
The way it is fitted puts the handle in the optimal position along the frame to ensure that the bike is well-balanced when lifted.

The main two sections, which are constructed of heavy-duty webbing-like material with a leather lining, are fastened by two strips of velcro on the underside. In addition to this, there are two straps, one situated at each end of the handle. These straps wrap around the frame providing additional security. Once having been wrapped around the frame, they pass through two nylon buckles and then fold back upon themselves, to be secured by more velcro.
The handle fits very snuggly and once properly attached seems very secure. It can be adjusted laterally whilst being fitted to allow for your preferred side of carrying.
The business part of the handle, the…er…handle bit, is made of thermo-moulded rubber and is attached to the main body of the unit by a length of webbing strap, which is firmly double-stitched at each end.

There’s not much more to say about it than that, other than it does the job and comes in four colours: black, red/black, British racing green, and royal blue.
How durable it is, only time will tell, but the materials are of a high quality and it has been designed to stay on the bike, so must presumably be weather-proof.
The only word of warning is that which is printed on the removable sticker you will find on the underside of the main pad.  It’s a sad indictment of modern society that it is thought necessary to warn people they should not hold this handle whilst riding the bike.
A reasonable person might have thought that common sense would have told you that. But then, as we all know, reliance upon common sense doesn’t necessarily stand up in court when it comes to an injuries claim! So please take care and don’t hold the handle while riding.
BWC 2013
Just registered for the Brompton World Championship 2013 to be held at Goodwood Race Course near Chichester.
What have I done!? My only hope: to not come last.
See you there…maybe?
Back in the Saddle
You may have noticed that my last posting was quite some time ago. And the one before that, quite some time previously. The reason, as before: pressure of work and continued bad weather resulting in a serious lack of inspiration. But all this is going change…or at least, I hope it is. And so, by popular request – OK, so I’ve had one request – I’m going to get things moving again with an update of what I’ve been up to over the last few months.
You see, whilst I might not have been writing about cycling, I’ve still been thinking about it. I’ve also been tinkering with my bikes, and despite the atrocious weather, even managed to do a bit of riding. No, really! In fact, so determined am I not to be beaten by the British weather, I have gone to the extreme lengths of buying a turbo-trainer, a CyclOps Fluid2 to be exact.

Alas, I have yet to find a way of attaching it to my Brompton, but at least I’ve been able to make use of my much-neglected, entry-level, near-vintage hybrid, and maintain my cycling-legs, without getting frozen, drenched or bedraggled.
Moving swiftly on, as the saying goes, perhaps one of the most talked-about Brompton-related innovations in recent months (apart from the latest models of course) is the release of the Brompton toolkit.

This is something I would have liked to have been able to write about, and so would I have done, had I had the foresight to order one as soon as they were released, last year! But I didn’t, and they are now out of stock, and it won’t now be available (in the UK) until at least April 2013. So my review will just have to wait. Nevertheless, plenty of other (better organised) people have written about the new toolkit and by all accounts, I think it is fair to say that the general consensus is a good one. I’ll just have to wait and see.
More mundanely, for some time now I have pondered what to wear whilst cycling, what to carry, and how to carry it, especially when commuting to work or attending a meeting etc. In the past I’ve tried wearing normal clothes (they get all sweaty and smelly); rolling up my suit into my C-Bag (difficult not to crumple it and the bag soon gets filled if you put your shiny dancing shoes in there too); or simply wearing cycling gear (not especially professional, unless you work in a cycling or sports-related industry).
I’ve also tried combinations of these, but none seem ideal. Which brings me to the suit bag, or more specifically, the Henty’s Wingman, I bought recently.
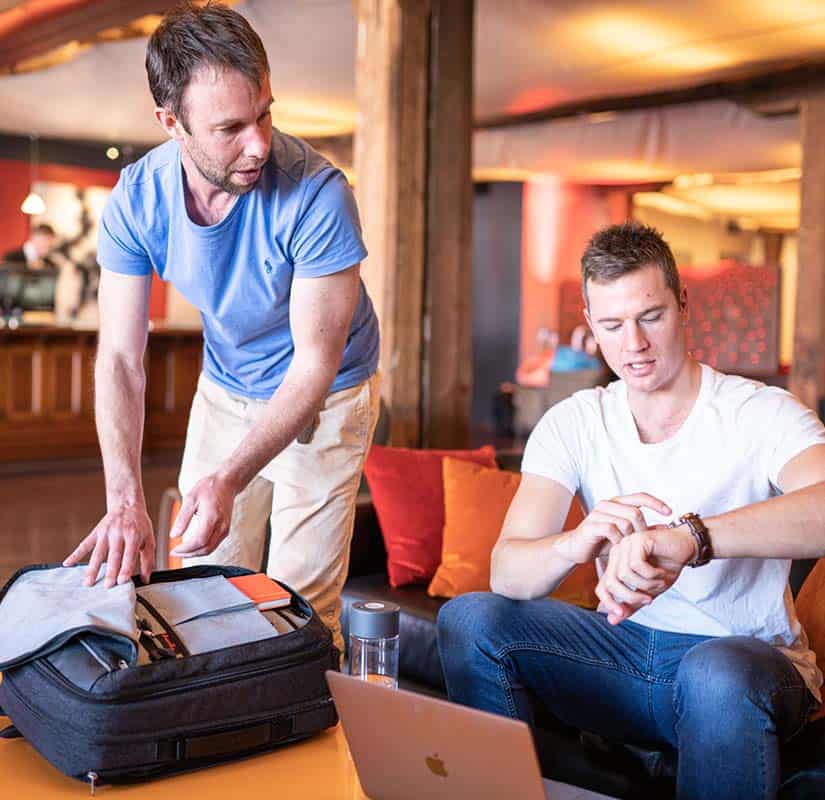
They are made in Australia. You can buy them direct or from one or two suppliers in the UK. I haven’t used mine much at the moment, but it looks very promising. It seems very well designed and rugged. You also get a free wash-bag with it. Once I’ve given it a good few goes, I’ll let you know what I think, though I have to admit to being quite optimistic.
On a more technical level, a couple of months ago I fitted some Shimano, single-sided SPD pedals to my Brompton on account of my feet constantly slipping off the original pedals. The fate of the original pedals was sealed following the folding pedal breaking in mid-thrust – not a pretty sight. Are they an improvement? The jury’s still out on that one.

I like the security of the clipless pedal, and the Shimano ones I fitted are much more robust than the Brompton standards. These particular ones, the PD-M324, have plain platforms on the opposite side, which is handy. But it takes some time to get used to them: for example, you have to wear SPD cycling shoes if you want to take advantage of the cleat clamps; if you wear normal shoes, it feels a bit weird and unstable if you end up pressing the cleat-clamp side of the pedal; and fitting a non-folding pedal results in a noticeable negative effect on the size of the folded bike – the right-hand pedal is OK, but the other one kind of sticks out a bit.
I know of some people who use the two-sided pedals as they stick out less and are generally less obtrusive, but the trouble here is you always have to wear your cycling shoes, whereas with the one-sided SPDs, at least you have the option of wearing normal trainers if you wish.
It would be good if there was such a thing as a folding SPD-type pedal, but I have yet to find one. The nearest I’ve heard of, and something I know some people swear by, are the quick release versions made by MKS, the EZY MM-Cube clipless for example, but these are quite expensive by comparison, and I’d be worried about losing one of them when folding the bike in a hurry (like when your train suddenly arrives and you have to do the double-speed-fold trick)!
Talking of tinkering, something else I’ve been experimenting with is changing the standard 50T crank to a 44T crank, the idea being that I would get a lower bottom gear to help with the hilly roads we have round here.  As it happens, it did help in that way, but I think I’m going to change back, the next time I need to replace the chain and sprockets.
The thing is, the gearing itself is fine (if you want a lower gear ratio, which I did), but it’s much more of a faff changing gear during a normal bike ride since you have to constantly flip both the derailleur and sturmey-archer levers on a BWR6 just to stay in the middle gears. Whereas, with the 50T crank, you can comfortably ride by just flipping the derailleur gear up or down, leaving the BWR in direct drive most of the time. But it was worth a try.
Finally, as my Brompton has a Brooks saddle, it is not so easy to carry as it is with the standard seat, so I tend to hold it by the frame. Most of the time, that’s not a problem, but when it’s been cold and wet, it has slipped from my hands. This has happened on a number of occasions so I have recently bought myself a carry handle.
This fits neatly onto the frame using velcro fasteners. Again, I haven’t had much chance to try it out, but what I can say is that, whilst not cheap, it is a well made product and provides a very good, secure grip for virtually no extra weight. Purists don’t seem to like them much, but I’m not one of them. I’ll tell you more about it when I’ve had time to fully try it out.
But until then, I’ll bid you farewell.
Biking in Barca
It’s been quite some time since my last blog post. This has been mainly due to pressure of work, but partly to a serious lack of inspiration, the latter brought about by the UK weather!
This summer (which it was in but name alone) has been the wettest on record. Where I live (in northwest England) apart from being perpetually cool and damp, there has been nary a sunny day since March. And as for the wind…well, it’s certainly not the sort of weather that inspires cycling.

But as it happens, I don’t have to cycle. I have a car. So if I don’t feel up to it, I don’t cycle. Simple as that. Yes, that’s a bit of a lame excuse, but there’s nothing clever about arriving at a meeting drenched in rain and sweat, looking like something akin to the Ancient Mariner, just to prove a point. Needless to say, I’ve been driving a lot more than usual, though I’m not proud to admit it.
Which brings me on to Barcelona. This may come as no surprise but a sun seeker I am not. Nor am I a bronzed god with a predilection for life on the beach. But I do love the Mediterranean climate in autumn, especially when combined with the history, vibrancy and culture of a great city like BCN.

But that’s not all – Barcelona is a true cyclists’ city. The old narrow streets such as those of Barri Gòtic, whilst sometimes dark and claustrophobic and certainly difficult to drive down, lend themselves perfectly to exploration by bike. And even though many of the streets are busy with people, bikes and pedestrians seem to have an instinctive understanding and, dare I say it, mutual respect. Quite unlike here in the UK and many other places where the twain shall rarely meet without at least a modicum of tension.
Beyond the narrow streets, the city is well endowed with dedicated, generally well-maintained and clearly signposted cycleways. No surprise then that there are cycle tours and bike hire shops aplenty.
But what was a surpise to me was the BPM rating (the number of Bromptons per minute), which was as high or perhaps even greater than you might expect to see in London, the ancestral home of the Brompton.
Plenty of other folders were also evident including a number of Nishiki “Oxford” folding bikes  – the clone that Brompton recently won an injunction against in the Spanish courts – as well as Dahons and other folders of all shapes and sizes. There were of course a number of regular bikes too, though proportionally these seemed to be much fewer.
The most notable bikes on the streets though, as well as parked in extensive lots right across the city,  were the Spanish equivalent of London’s “Boris Bike” – the distinctively liveried red and white Bicing cycles. Sadly, these are currently only available to Spanish residents (one needs a Spanish bank account to register) but they are incredibly good value for money and apparently good to ride, despite their weight and robust build.
But whatever your taste in bikes, Barcelona with it’s ideal climate, plethora of cycleways, relative lack of inner city traffic, and rather compact nature, is the ideal place for exploratory pedalling, especially at this time of year. I couldn’t recommend it more highly.
Feliç ciclisme
Fat Bloke on a…Cardboard Bike
Just came across this video and couldn’t resist posting it on my blog…
Izhar cardboard bike project from Giora Kariv on Vimeo.
Pretty amazing, don’t you think? Must start saving all that Amazon packaging…
Brompton Seat Height Setting
For me, if there’s one thing guaranteed to ruin a good bike ride, it’s a badly adjusted seat. By which I mean, the saddle is too high, too low, too far forward, too far back, raised too much at the front, raised too little at the front. Some of these issues are much easier to deal with than others and there’s plenty of info about it on the ‘net.

With a Brompton (or similar folding bike), the easiest of these to deal with is seat height adjustment – something you do every time you unfold it. But therein also lies a problem. Having to find the right height each and every time you unfold the bike, can get a bit wearing. There’s nothing worse than setting off to find the seat height is wrong then having to stop and adjust it, sometimes more than once.
So what we folding bike riders need is a quick and simple solution for finding preferred height that we only have to do the once after each unfold. I have in fact heard a number of suggestions such as measuring the seat height against a part of your body (your navel for example); attaching a piece of cord of the correct length to both the frame and the saddle so that when the saddle is at the right height, it is taught; or, marking the seat with a pencil or an indelible marker pen.
I’ve tried the first one but no parts of my body are at an appropriate height to measure the saddle height from (without the use of a ruler)! I haven’t tried the cord idea but I suspect that there would be problems with it trailing and getting snagged on things when the seat is dropped, and wrapping it up each time would probably become a bit of an annoyance after a while. As for the marker pen, I’m not sure I would be brave enough to do that and suspect that it would just wear off or smudge with time, and if you get it wrong, that too would become an annoyance, especially if you couldn’t get the old mark off.
Anyway, whether or not these (or any other ideas) work for other people, my solution is based on a relatively simple way of measuring using nothing more than your own fingers. This is how I do it.
Firstly, after unclipping the seat clamp, I lift the seat pillar to full height and grasp it at the base with one hand, resting my lowest finger (the pinky) firmly against the pillar clamp.

Unclip the seat pillar and lift it to full height, grasping it at the base with one hand
I then release the three lowest fingers…

release the lower three fingers…
..and lower the seat pillar whilst still grasping it with thumb and forefinger, until my index finger rests against the seat pillar clamp.

then lower the seat pillar onto the index finger
Finally, I reach across with my other hand and lock the clamp. The seat should then be at the correct height.
Obviously, that won’t work for everyone – I suspect my fingers might be a little bit chubbier than yours for example, and of course, my legs will almost certainly be of a different length. So you can vary this to your own requirements by using one, two or three fingers. And if that’s not enough, you can use two hands which then gives you seven fingers to measure with (yes, I know, most people have eight fingers, but you still need to leave one to hold the pillar!).
For finer adjustment, you can have your fingers tight or loose – that’ll give an additional range of a quarter to a third of a finger width. For example, my finger-gauge measurement is ‘four fingers – tight’ (pressing down so the pillar digs into the lowest finger, resting against the finger bone).
But how do I know how many fingers to use in the first place, I hear you ask? Well, firstly, unless the seat is already at the correct height, adjust it to more or less the height you think it should be using rack-of-eye, and check it by maybe pedalling round for a bit, then re-adjusting as necessary until it’s right. Once you are happy with it, place your index finger and thumb snugly at the base of the pillar, holding it firmly…

Grasp the seat pillar at the base when it is at the correct height…
…then release the clamp with your other hand and lift it up to full height. Don’t let go as it rises – keep your finger and thumb in the same place along the pillar.

…and raise the pillar to full height
Next, close your remaining fingers onto the pillar, and if necessary, your other hand too plus as many fingers as you can fit between your upper (index) finger plus those holding the pillar, and the pillar clamp. If you need more than three fingers to fill the gap, you can add up to four more below using your other hand.

…then measure the gap between your index finger and the seat clamp with your remaining fingers
Note how many fingers there are and how tight or loose it needs to be to get them all in. This is then your unique measurement. Effectively, this is just the reverse of what you do to set the seat height. But again, if you need more than eight fingers (in total) this isn’t going to work for you.
Seems a bit tricky and it’s much harder to explain than to do, but it works for me. Give it a try and let me know how you get on.
